Wednesday, April 6, 2011

Lasagna, Lasagna, I love you, Lasagna, you're only a few ingredients away.

One of the dishes that has been on my "to do" list for a long time has been Lasagna. This has been something I've put off for years, but after one too many hints from mom, I decided to just go for it. After seeing a few more elaborate recipes online, I decided to try one of the "easy" recipes first to ease into the wonderfully gooey world of lasagna.

After looking through a few recipes I opted to go for the version on Diana's Kitchen (check out the recipe there!). 

I made a few changes: 

  1. Used my own sauce!
  2. Mozzarella cheese instead of Monterey Jack.
  3. Fresh garlic instead of powdered, and used earlier to help the flavors meld sooner. 

Everything else was kept the same.

I set up the ingredients diligently. Also note the beer: The beer is very important (for my own enjoyment).


The all important basic tomato sauce. With the slight substitution of using organic sauce rather than whole tomatoes, it's the same sauce that I use for my pizzas, which I've described quite a while ago.


Water is brought to a boil then salted, and the noodles cooked according to the package. Pops said he'd prefer a slightly softer noodle but didn't have a real problem with it.


Poured gently into a strainer to drain and cool.


Chopped onions


Chopped mushrooms.


To be tossed into the browning meat.


Cook it all down and add the sauce and the seasonings.


I laid the lasagna noodles by threes..


And layered with sauce, cheese...


..and more cheese!


This is repeated a twice more.


An errant extra noodle was laid across, as my motto is waste not. I suppose it could have been added to the layer before without much ill effect.


A final layer of cheese:


After baking.


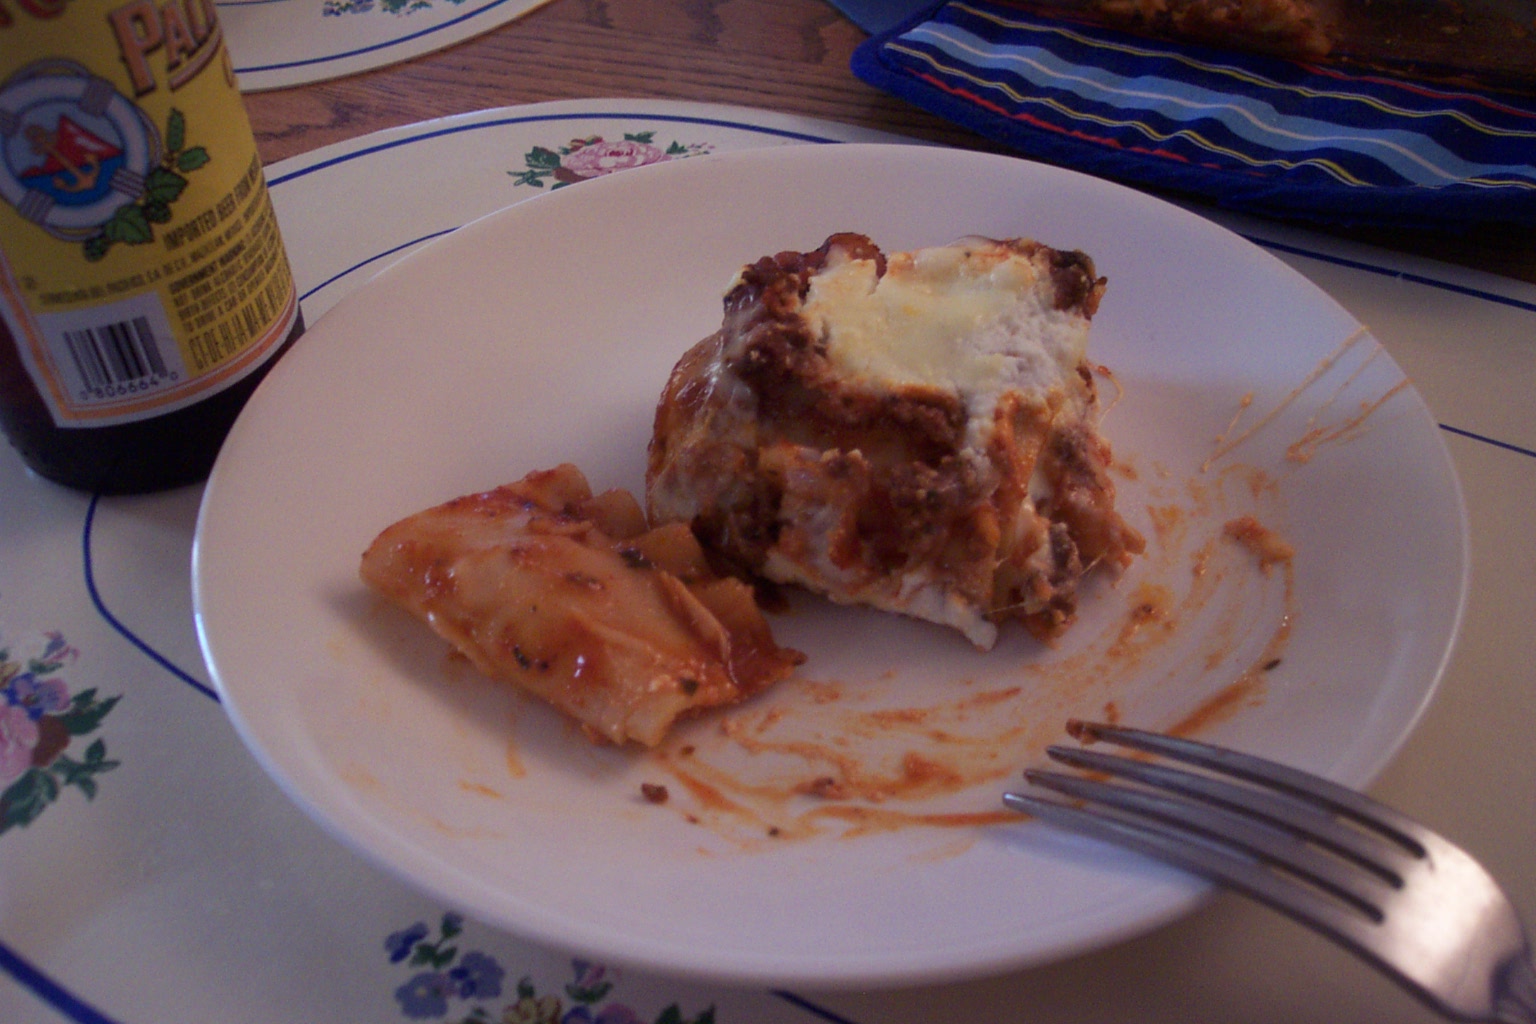
Wonderfully delicious.

Friday, April 1, 2011

New ideas and lessons learned: Pork chops with Sweet potato and Apple

Heylo Cast Iron Therapy readers! Sometimes you take a chance, see a good idea, and decide to go for it. Sometimes circumstances make those ideas seem pretty good. This was one of those nights. Having some extra pork chops thawed out in the refrigerator that mom demanded that I make use of, I found an interesting recipe in the KitchenAid Best-Loved Recipes: Pork chops with Sweet Potatoes and Apples. 

I've always liked sweet potatoes, and apples, and hadn't ever really thought to put the two together. The combination sounded good, and bacon always works well in a meat dish. The reality was slightly off from what I wanted. It was still a good recipe but I'd definitely tweak it quite a bit. I was rushed as well, so that may have played a factor. The sweet potato and apple combination was a bit too sweet, and lacking that savory quality. The small amount of salt I think relied on a better quality bacon than I had, resulting in a slightly blander chop than I'd like as well.

Here are some of the changes I'd make:

-Brine the pork chops, they were a little on the bland and dry side
-Reduce the number of sweet potatoes and/or replace half with regular potatoes
-Soak potatoes in water and let drain to remove some starch
-Cook the potato/onion/apple mixture in batches to make it easier to cook, and increase the browning
-Add more salt!
-I think some better quality or thicker bacon with more fat would have helped.

Full recipe adapted after the photos!

Mise en place: 


The shredded potatoes, onions and apple. This was a serious amount of work to do, especially with a not so great peeler. Chopping the apples probably would have been fine too.


Pork chops rubbed in lemon juice!


Bacon!


Pork chops didn't brown as nicely as I wanted to! Next time, more time, more heat!


All the veggies and some seasonings cook down in the pot! I have no idea how this would fit into a pan.


Artistically served the chop on a mound of the potatoes. Not bad, not bad. Still, I'd make some changes!


Pork Chops with Sweet Potatoes and Apples

Adapted from KitchenAid Best-Loved Recipes:

4 slices of bacon
4 pork chops
Half of a lemon
2 medium sweet potatoes (original recipe calls for 3)
3 apples
1 small onion
1/4 tsp salt
1/8 tsp black pepper
1/8 tsp nutmeg
1/4 tsp chervil
1 tbsp chopped fresh parsley

1. Peel and shred the sweet potatoes. Core the apples, then peel and shred them too.
2. Preheat oven to 350 F degrees.
3. Take your lemon half and rub it all over the pork chops, giving everything a good coat.
4. Cook bacon until crispy, and keep a good amount of fat in the pan, then chop bacon into bits. Keep the extra fat just in case actually.
5. Make sure the pan is still hot and brown the pork chops in the bacon fat, then set aside.
6. Pour the fat into a large pot, enameled cast iron would be the best! If it looks inadequate, add in the extra reserved fat, or some vegetable oil works.
7. Toss in onion, apples and sweet potatoes into the pot, add the salt, pepper, nutmeg and chervil. Cook for 5 minutes, stirring occasionally, but not too much to give the potatoes and good crisp.
8. If using an oven safe pot, toss the chops on top, if not put mixture into a greased oven safe pan and top with chops. Top chops with bacon and parsley. Cover with lid or foil, place in oven for 50 to 60 minutes.
9. Serve chops on a mound of potatoes, enjoy!

Saturday, March 26, 2011

Turning Vietnamese Episode 4 - Cha Trung Hap

Hey Cast Iron Therafans, today we pay tribute to one of the most versatile of proteins, the egg. Boiled, an ingredient in baked goods, fried in all manner of ways, the egg is very broad in its ability to satisfy cravings. In this post, the treatment is a distinctly Vietnamese manner, steaming. This isn't necessarily the traditional way, as I doubt that in olden times Vietnamese farmers had Corelle dessert-cups, but hey use what you've got!

Cha Trung Hap is basically a Vietnamese meatloaf, with a slightly higher emphasis on eggs, cooked through a steaming method, rather than an oven. There's a fried variant as well, but let's pretend this is a healthier version.

The recipe is at the end, but first the picture breakdown.

This is the true base of the dish, a mixture of ground pork, garlic and onion is marinated with a healthy dosing of fish sauce. Yes, fish sauce is in everything in Vietnamese cooking. I suppose you could use salt if you're a coward.

Rice vermicelli is soaked in hot water until it is soft.


And chopped up into little pieces about so. I guess roughly 3/4 of an inch but it's hardly an exact science.


Mix into the pork.


Start cracking some eggs and beating them roughly. We don't want them blended too well here.


The pork is incorporated into the egg gently. I found that using two forks and smashing the pork between the tines to break it apart.


Set the corelle or other durable bowl into a larger pot and set into some water, and bring to a rolling boil, then lower heat to a gentle boil. This will cook for at least 20 minutes.


Here it is not quite done yet. You want the eggs to be fully cooked and set. A stab with a chopstick will not result in yolk coming out.


And here it is. Scoop out onto rice and enjoy.


Perhaps with some of the mustard pickles, mentioned in an earlier post. 


The rough and ready recipe:

1/2 pound ground pork.
1/4 cup chopped onion
2 cloves garlic, smashed.
4 tablespoons and 
4 tsp. fish sauce.
4-5 eggs
1 bundle of rice vermicelli (Not a whole package, they come in threes or sometime fours)

1. Mix ground pork, onion, and garlic, mix with 4 tablespoons of fish sauce let marinate for at least an hour or overnight in the refrigerator.
2. Soak rice vermicelli in hot water. Check every 5 minutes for a soft consistency, then remove to drain.
3. Chop vermicelli into small pieces. Mix with the ground pork mixture. 
4. Crack 4 eggs, beat lightly.
5. Incorporate mixture into eggs, and add 4 tsp of fish sauce.
6. If it looks like the eggs are just mixed into the pork covering it all, perfect. If you need an extra egg, go for it.
7. Put in a bowl that will fit in a larger pot and set in a few inches of water, safely under the bowl's edge. Put a plate or a lid on the bowl.
8. Bring to rolling boil, then a gentle boil. Check after 20 minutes. The dish is done when a stab no longer results in liquid egg coming from it.

Wednesday, March 16, 2011

Spam alert! Don't delete this post.

As a chef and also as a minority, I sometimes find myself a proponent of trying new things when my original intention was simply talking about my own experiences in food, rather than trying to be some radical extremist forcing my culinary ideas down the gullets of the uneducated. This is one of those times where I know my opinion is going to be reacted to with skepticism, horror, curiousity and outright resistance.

That's because today's ingredient is that infamous canned meat, SPAM. As someone who was first exposed to Spam at a young age without preconceptions of the meat hierarchy of right and wrong, I grew up very accepting of it and enjoying it on its merits. I've never understood the reasoning people have given me for why it is an unholy spawn: shape, color, texture, ability to be sliced too easily, being in a can. 

I've heard it, I've ignored it. The only reason not to eat it would be for health reasons, but that goes for so many other things I eat as well.

Oh yes, this is a recipe developed by my dad, so if you reject it you're intolerant and close-minded. That's all.

This recipe is beautiful in its simplicity.

Spam, onion, garlic, a bit of a chili pepper, and optionally some fish sauce. Ground pepper too if you feel like it.


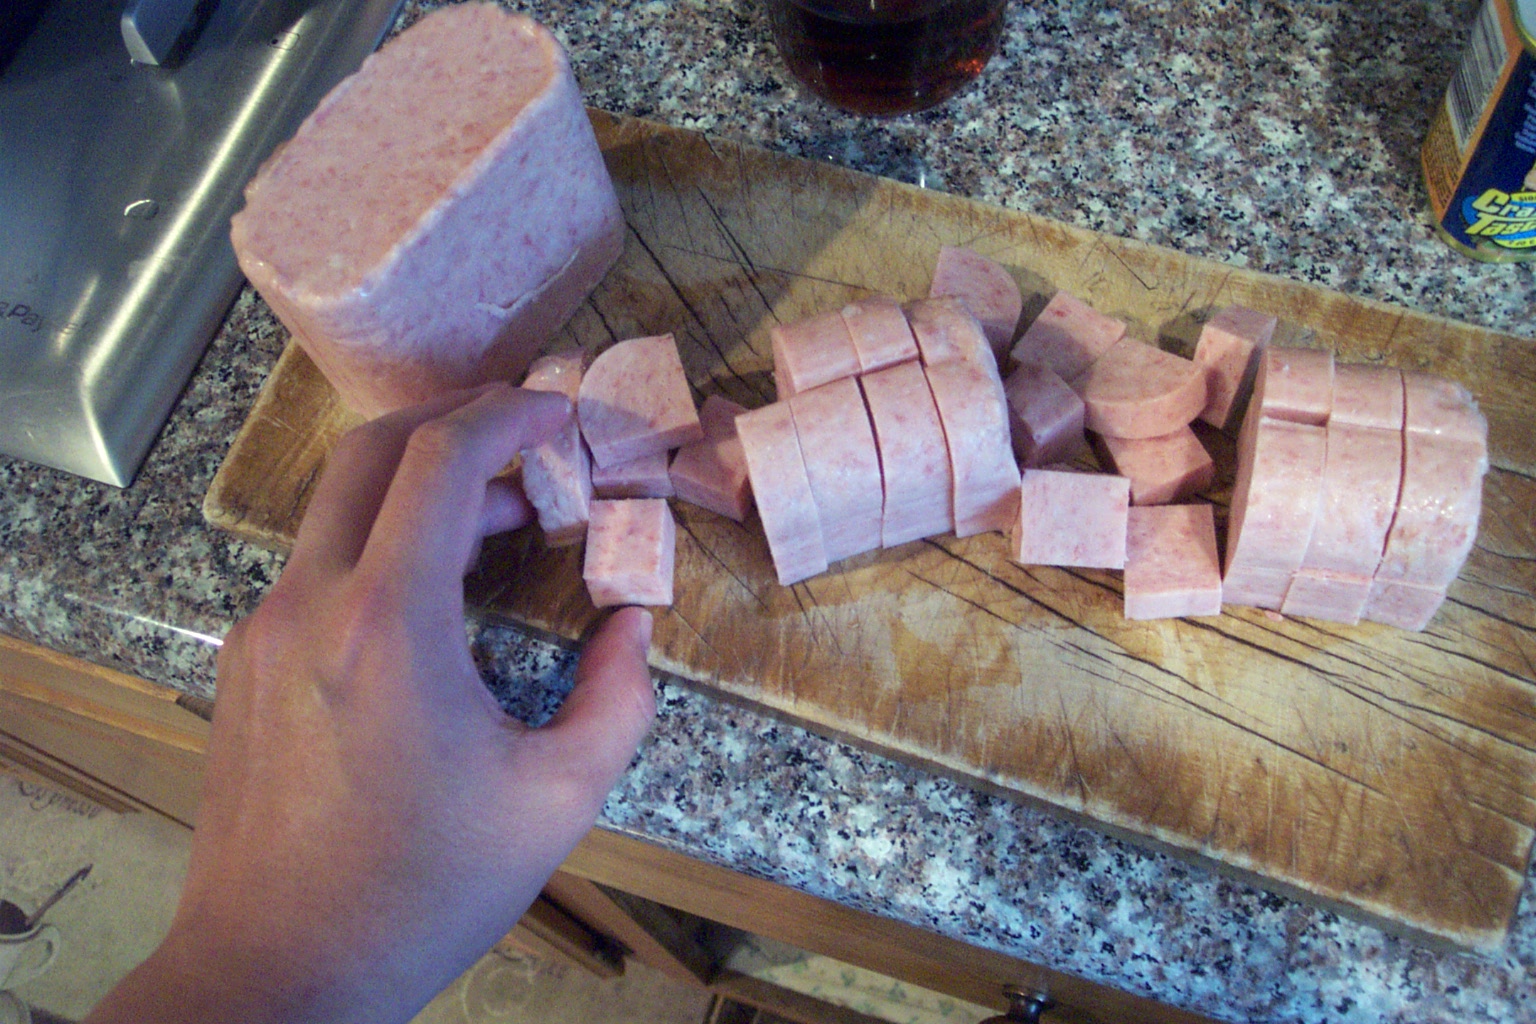
So easy to slice, so giving toward any quality of knife! Oh spam, how I regret not opening you up in the Grand Canyon. In fact, how I regret not replacing all of the meat I brought with you instead due to an intolerant non-minority. But I digress. Each block is sliced in half, and then into smaller blocks. You get the idea.


This is put into a pot and covered with water, then brought to a boil, keeping it at a boil for 10 minutes.


And now we prep the onions, which for once isn't cut into fine dice.

  
The garlic is minced, the pepper is chopped a bit. A little goes a long way with those babies.


Once the spam has had sufficient sodium leached out of it from boiling (keep the broth if you can), it is tossed into a hot pan with just a dash of oil to start the caramelizing. A large spatula helps to toss the pieces around as their sides get browned.


The rest of the ingredients are added, perhaps with a bit of the broth, or plain water to create steam to help cook down the onion and garlic.


A dash of fish sauce to add umami and reintroduce salt.


And there you have it, the way I've enjoyed Spam since childhood. Serve with white rice!


Recipe:

2 cans of spam
1/4 cup of sliced onion
1-3 gloves of garlic, minced
Ground pepper
nib of hot chili pepper (optional)
Dash of fish or soy sauce (optional)

1. Cut Spam into blocks, roughly 32 - 40 a can (as seen above)
2. Cover spam pieces with water, bring to boil and boil for 10 minutes.
3. Drain the spam pieces, reserving some of the broth.
4. Toss in a hot pan with a little bit of oil to develop a nice crust on as much of the spam as you can.
5. Add onion and nib of hot chili pepper and cook until partially soft.
6. Add the garlic and pour in a little bit of water for steam to cook down the onion and garlic.
7. Serve with rice and vegetables.

Wednesday, March 9, 2011

My first blended salsa, and it was splendid.

In one's life, many rites of passage are placed before you on your path to maturity. Your first step, taking the training wheels off your bike, your first car, your first job. This blog post has very little to do with those sorts of groundbreaking achievements, but hey, it's good salsa.

As per usual, this project for a blended salsa was inspired by the fellows at The Paupered Chef. 

Two bags of dried guajillos are soaked in boiling water for half an hour.

In a fit of inspiration, I used the canned tomatoes to be used late to weigh them down.


The peppers are then seeded and stemmed.


Give a bunch of cilantro a good washing and drying.


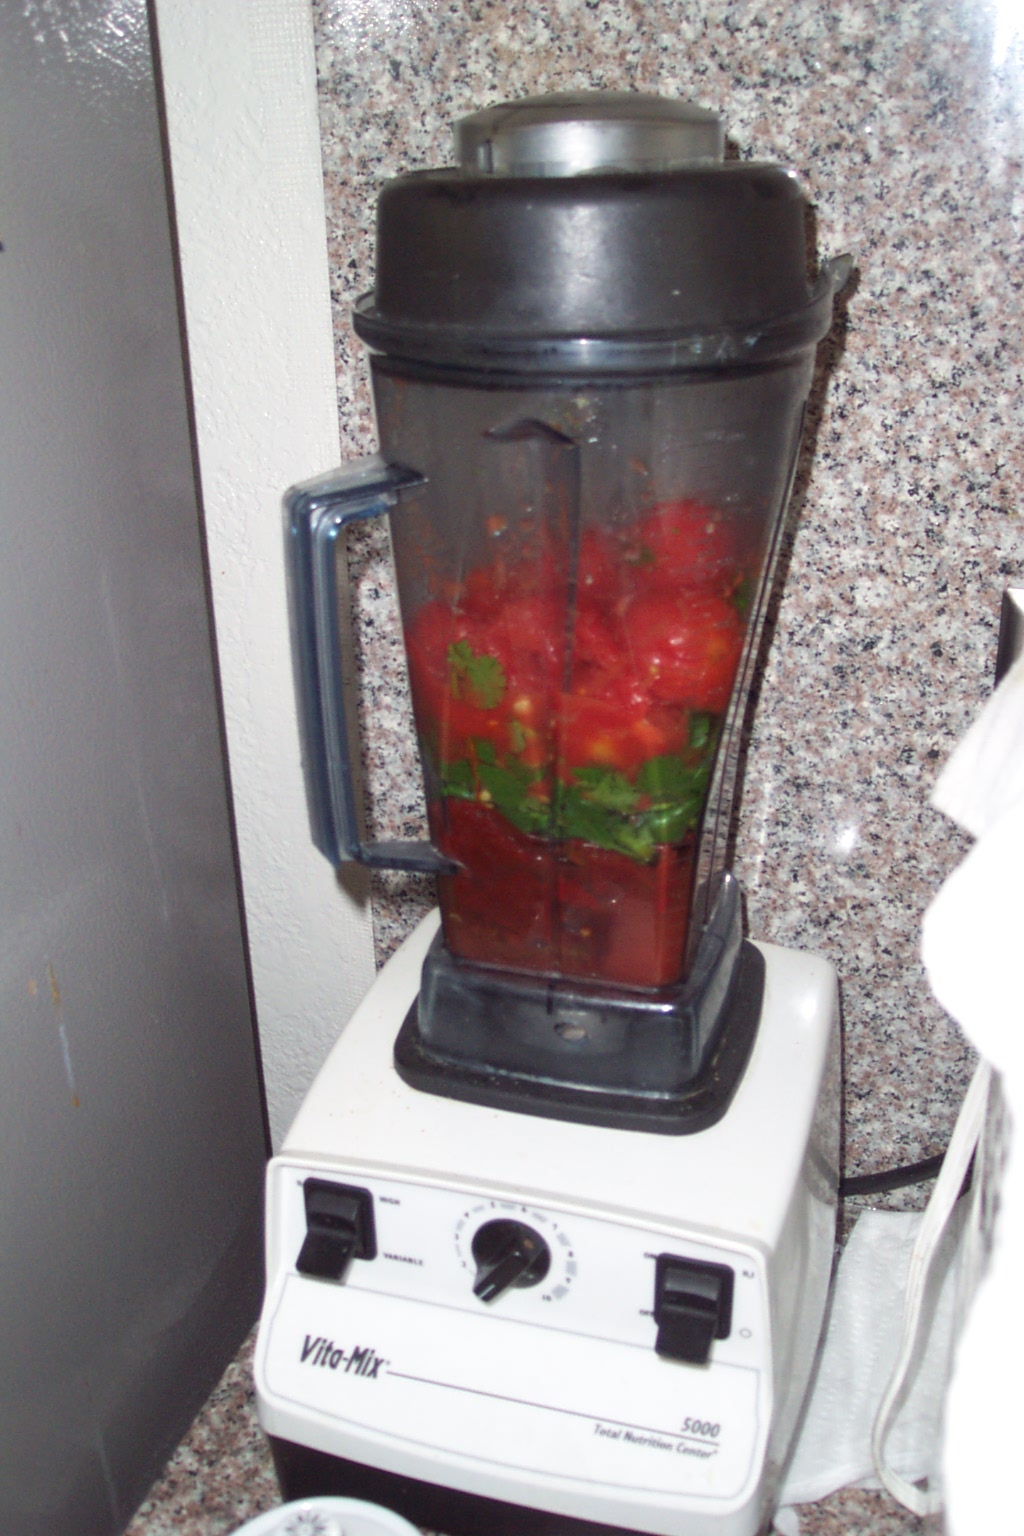
And combine with all the other ingredients:
28 oz of whole peeled tomatoes, 
half an onion, 
2 cloves of garlic, 
and the juice of three limes


A perfect accompaniment to carnitas...


And chips!


When I do this next time I think I will add some more hot peppers to spice it up. While this had an excellent depth of flavor, it lacked a bit of bite that I was expecting.

Wednesday, March 2, 2011

Heading to the Grand Canyon this weekend, will be back soon!

Hey Cast Iron Followers,

I think I've been doing a pretty fair job at keeping up posts at least twice a week. Doing some serious packing for a Grand Canyon hike this weekend, so my pontifications on produce, my feelings on food and my usefulness with utensils is a bit compromised! I'll be getting back to you probably on Monday night, provided the lactic acid from my legs doesn't overwhelm my brain.

Til then!

Tuesday, March 1, 2011

Carnitas! Loose translation: A carnival of pork in your mouth.

Ok, it doesn't really translate into that, but with one bite, you could see why I describe it as such.

Really, what more needs to be said about this wonderfully porky dish? One of the more recognizable selections in almost any Mexican restaurant, the times I've come upon this dish it has often been a flavorful but softer version, seeming to be more braised than given the more traditional all out lard treatment that Rick Bayless uses. As I wasn't feeding an army I found the Paupered Chef's adaptation a bit more scaleable.

I visited my local Mi Pueblo supermarket, where I was treated to a very nice shopping experience, and I even purchased some pork fat from the nice gents at the meat counter, where they trimmed it for me, after a bit of confusion on what it was I wanted. Of course I also needed the meat, pork shoulder, or espadilla. Tres libras of it in fact.


The large slabs they gave me were probably perfect, but I cut them a bit more to ensure I could put all the pieces of meat into the lard. I won't make that mistake next time, as I think thicker cuts would have stood up well, and produced more of the softer textured pork to balance with the wonderfully crisp exterior that I had slightly more of. I'd probably season a bit more aggressively next time, and substitute a good deal of orange juice instead of lime juice, as I think the sweetness would add to the taste. I should have added some garlic as well. 


Still, the results were fabulous for a first time. After 2 hours in bubbling lard, the pork came out golden and easily pulled apart with two forks into smooth, chewy pieces. Note: Check your setup often, keep your face clear when you open the lid. This can't be stressed enough when you've got bubbling pork fat anywhere. The seasoning issue was mitigated with some sprinkles of kosher salt with a spritz of lime to balance the fatty savoriness of the carnitas. I wish I took the time to show my backyard setup to make this, but I was running around doing several other things.


I found that this guajillo salsa recipe described here was a great accompaniment to the meat.


Mmmm..... Sorry about the mess folks, I was a bit busy.