Instead, I opted to try out no knead bread, a baking application which has been on my mind since I read about it in The New York Times (online). It also involves an enameled cast iron pot, which if one uses as the mixing bowl as well, could justify my claim that this is indeed a one pot meal. Plus a towel and table. Details. And whether some slices of delicious bread and butter constitutes a meal.
Sunday, April 15, 2012
No Knead to Fuss: One Pot of Bread
Instead, I opted to try out no knead bread, a baking application which has been on my mind since I read about it in The New York Times (online). It also involves an enameled cast iron pot, which if one uses as the mixing bowl as well, could justify my claim that this is indeed a one pot meal. Plus a towel and table. Details. And whether some slices of delicious bread and butter constitutes a meal.
Wednesday, February 29, 2012
Ciabatta Believe It! Roasted Garlic and Herb Ciabatta
Are there terrible puns I am unwilling to make? No. Especially if they are based on food. I will apologize for them though, so, I’m sorry. Kind of.
Now that apologies are out of the way, I will put the most awesome foreword I could ever put on this blog (for now.) This bread is Michael Ruhlman approved! He retweeted the picture I put on twitter, saying “nice crumb!” Super awesome feeling to have someone I respect that much compliment something I did learning from his book!
So with that in mind, I promised I would post about the ciabatta bread in my last post, and so here we go.
I opted to take some of his suggestions for making a roasted garlic and rosemary bread to heart, and substituted dried oregano for fresh rosemary.
As always, the use of Michael’s guidelines in Ratio greatly demystified the process of baking.
Tuesday, November 22, 2011
An Autumn Harvest Dessert–Persimmon Tarts with a Baking Stone.
After the adventures of pumpkin pie comparison, I still had one pie dough chilling in the refrigerator, waiting for some exciting use. Not wanting to let it wait overlong, I turned to inspiration in the fruit basket on my counter, and selected the Fuyu persimmons picked from my friend’s backyard.
Some quick research was required before I jumped into this project, and seeing that the top result for a persimmon tart on Google was from the very talented Hong and Kim from the blog The Ravenous Couple, I needed to look no further!
The main difference in the recipe is that while they used convenient puff pastry, I was using homemade pie dough (see previous post here) made very conveniently with the KitchenAid Mixer and the insights of Michael Ruhlman’s Ratio. I also used a handy baking stone because it was readily available. I’m pretty sure its use really helped the dish.
Monday, November 21, 2011
Can’t Be Crusted: First Attempt at Homemade Pie Dough.
You may remember the post on pumpkin pies. One of those posts required a prepared pie crust, so I made my own with the readily available ingredients of flour, butter, sugar, and water. I wanted to take on the question of whether things really were “easy as pie.” If you have a KitchenAid Mixer, it definitely makes things easier!
I once again turned to Michael Ruhlman’s Ratio for the methodology to pie dough. It’s pretty simple really, as easy as 3-2-1. Three parts flour, two parts fat, and one part ice water.
Before we get started, this will result in two nine inch crusts, so adjust as necessary. The math’s pretty simple.
Two sticks of butter is 8 ounces, making the rest of the calculation easy; you will need to use 12 oz. of flour and about 4 ounces of ice water to complete things (Note: since butter has some water in it already, you want to be very careful with the addition of it at that step). A pinch of salt and some sugar evens out this pie dough for use with desserts.
But you don’t just need a ratio, you need some technique as well. The butter is better if it is cold. I cut up the butter into three lengths, then those into three, and then finally into little cubes before placing them together loosely and into the freezer while I prepared everything else.
To twelve oz. of flour, two tablespoons of sugar are sifted in.
Now the hard part. Mixing everything in together gently yet thoroughly, starting with the flour and chilled butter. A very gentle stirring through with the Kitchenaid paddle attachment is how I went about it.
Once it started to come together, I gently added two ounces of the water, before adding a little bit more as necessary. This is about as far as you want to mix things in, and the appearance seemed about right to my eyes. I may have overworked it already. At any rate, proceed carefully.
Gently work it together into two balls. I did this by making one ball and cutting it in half.
Flatten into disks, wrap well and place in refrigerator until ready to use.
When you’re ready, roll it out into a 9 inch crust, if that’s what you’re using it for!
Let me know what you think, did I totally botch it, or does it look ok?
The next post will showcase another use of pie dough. Botched or not, a careful treatment of the dough and the use of a baking stone will result in a fantastic treat in the form of a fruit tart!
Sunday, November 13, 2011
Real Estate Lady Pumpkin Pie: Part 2 of the Pumpkin Pie Matchup!
Here’s the second part of Pumpkin Pie Matchup, where the second contender to compete against the Alton Brown pumpkin pie appears! Both go in… to your stomachs!
I guess matchup isn’t really fair the right descriptor here. It’s not like I combed through thousands of recipes to decide which two I’d compare. But “ill informed comparison of pumpkin pies” doesn’t quite have the right ring to it, so there you go. Now the confessions are done, on to the main event.
But, why “Real Estate Lady” pumpkin pie? This recipe turned up on the doorstep quite literally, attached to a sugar pumpkin by one of our friendly neighborhood real estate agents informing us of what the values of our homes were. Such a bold marketing plan with foresight surely belonged to a person whose tongue was able to discern the best pumpkin pie recipe within my zip code! Upon doing some further research on the web, it turns out that the recipe is really just a modified Libby’s Famous Pumpkin Pie recipe, substituting Libby’s canned pumpkin with freshly pureed pumpkin (handily supplied by the friendly local real estate agent, in case you forgot.)
Whatever the reason, the arbitrariness with which this recipe came to me warrants it a spot in this two part challenge.
First off, preheat oven to 425 degrees.
Not having pumpkin pie spice on hand, I fashioned my own according to this recipe.
The Alton Brown Pumpkin Pie: Part 1 of the Pumpkin Pie Matchup!
This is both a follow up to the Alton Brown recipe series and quite related to autumnal eats; the pumpkin pie, thanksgiving essential (up to debate). And this is the first of two posts comparing with another recipe to boot! More on that later.
Hopefully you’ll be using homemade pumpkin puree, but if not, I’m sure the canned stuff will work. Whatever the case, assembling the crust comes first.
For the AB Pumpkin Pie, the application takes a cue from graham cracker crusts but replaces the cookies with more assertive and distinctive gingersnap. Add some ground ginger, brown sugar and some melted butter and you’ll be set! More detailed instructions at the end.
First preheat the oven to 350 degrees Fahrenheit while assembling the ingredients.
Monday, August 15, 2011
Black bean, gluten free brownies.
Skepticism. This is the word that best describes what I thought when my awesome cousin Jamie told me about this recipe from 101cookbooks. I mean, brownies, with black beans? Well, it took me a few years but I decided to finally get around to it. Helpful since I was going to a few events after making these where there would be some folks with gluten allergies.
They were ranked rather well actually, in case you were wondering.
The ingredients are straightforward: chocolate, butter, black beans, vanilla, instant coffee, honey, walnuts, sea salt and eggs.
The chocolate is unsweetened. Pure and more towards the bitter end of things. If I try this recipe again I may look into some other chocolate to see how the results compare.
Unsalted butter is added.
And mixed and melted thanks to the wonderful technology of microwaves.
Nuts, chopped.
Black beans and a share of the nuts are tossed into a food processor.
Along with some vanilla..
And a bit of the chocolate mix.
And turned into a pulse. I have to admit things started to smell quite good at this stage, a nice chocolatey and nutty smell. The taste wasn’t quite there with the lack of sugar to cut the bitterness of unsweetened chocolate however.
Hark, unsuspecting pristine melted butter chocolate liquid.
Is pillaged by a rampaging band of chopped nuts.
And instant coffee. The humanity!
This mixture is stirred together to make a smooth liquid and set aside.
Four eggs.
Beat it!
And add the honey or agave nectar. I had honey on hand.
And beat them together.
Next put the chocolate liquid into a bowl.
And start working in the puree. Yes, I am aware it looks quite lovely. It gets better.
Then the egg/honey or agave mixture is added in. But save a little bit of it!
Once well mixed, pour into a baking pan lined with greased parchment paper.
The remaining egg mixture is drizzled on top for looks.
Sort of? Is this art deco? Americana? I know nothing about art.
Bake and voila. Black bean brownies.
And here’s a piece all by it’s solitary lonesome.
It is quite fudgy and very soft.
With a rich chocolate flavor. If you’re expecting that resistance that a well baked brownie will give you, you might very well be disappointed, but taken on it’s own merits, the black bean brownie is definitely worth a look.
For the recipe, please check it out on Heidi’s lovely blog, 101cookbooks.
Wednesday, February 9, 2011
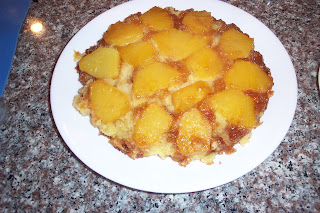
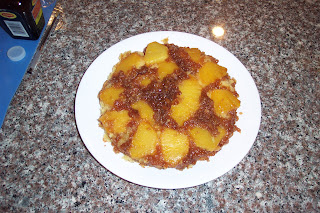
I want to turn this whole cake upside down.
Finally I decided not to waste, and scooped out the brown sugar as best I could and rearranged it on the large cake. It's like candy!